Microsoft and Apple roll out new operating systems every year in the fall. If the automatic update feature is enabled, your computer and devices get updated without you being asked, and could prohibit students from opening Examplify and taking exams. In order to prevent that from happening, you can disable the automatic update feature.
Your Mac is designed to keep itself up-to-date. It automatically checks Apple’s servers for new software updates, and it tries to automatically install new updates when they become available. But sometimes you don’t want your Mac to automatically install new software. If that’s the case, you should disable automatic updates on your Mac.
Here’s how to disable automatic updates on your Mac:
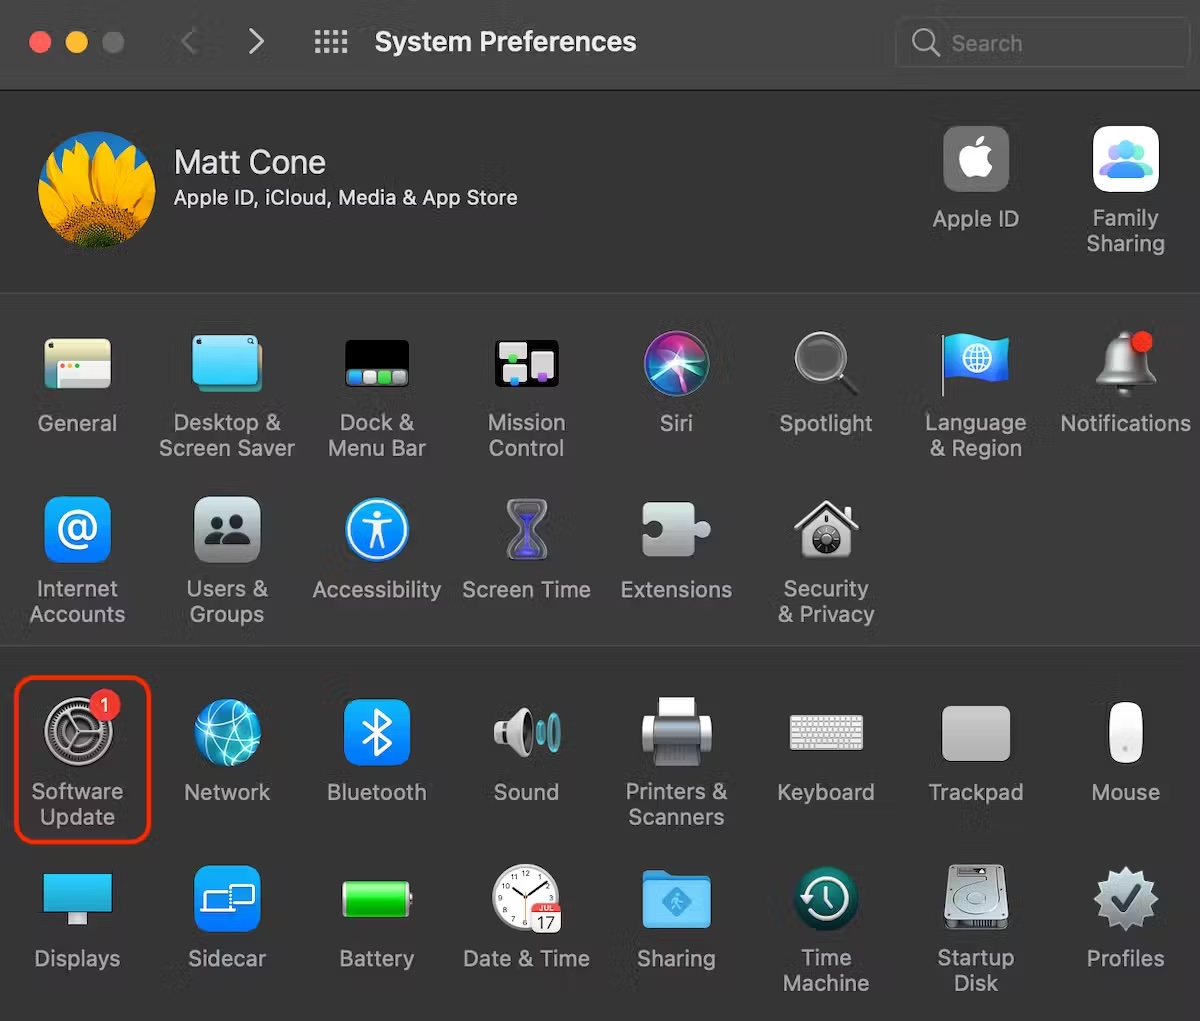
- From the Apple menu, select System Preferences.
- Click Software Update. [view screenshot]
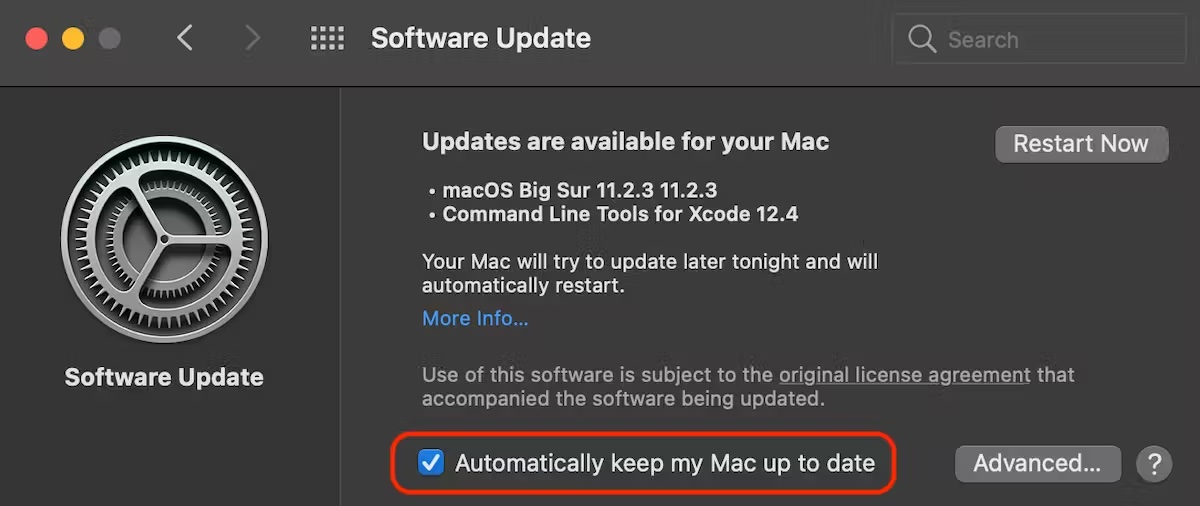
- Deselect the Automatically keep my Mac up to date checkbox. [view screenshot]
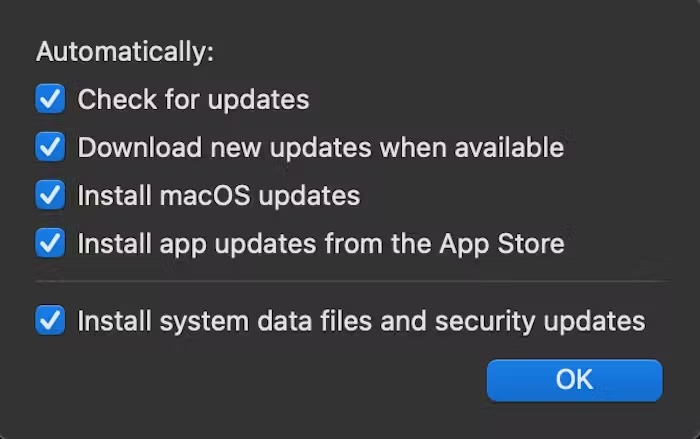
- Or, if you’d prefer to only disable some automatically updates, click the Advanced button. Here you can configure which type of updates you’d like to have automatically installed. [view screenshot]
- That’s it! You’ve successfully disabled automatic updates on your Mac.
![]](https://cdn.bcm.edu/sites/default/files/mac-disable-automatic-updates-1_0.avif)
Your iPad is designed to keep itself up-to-date. It automatically checks Apple’s servers for new software updates, and it tries to automatically install new updates when they become available. But sometimes you don’t want your iPad to automatically install new software. If that’s the case, you should disable automatic updates on your iPad.
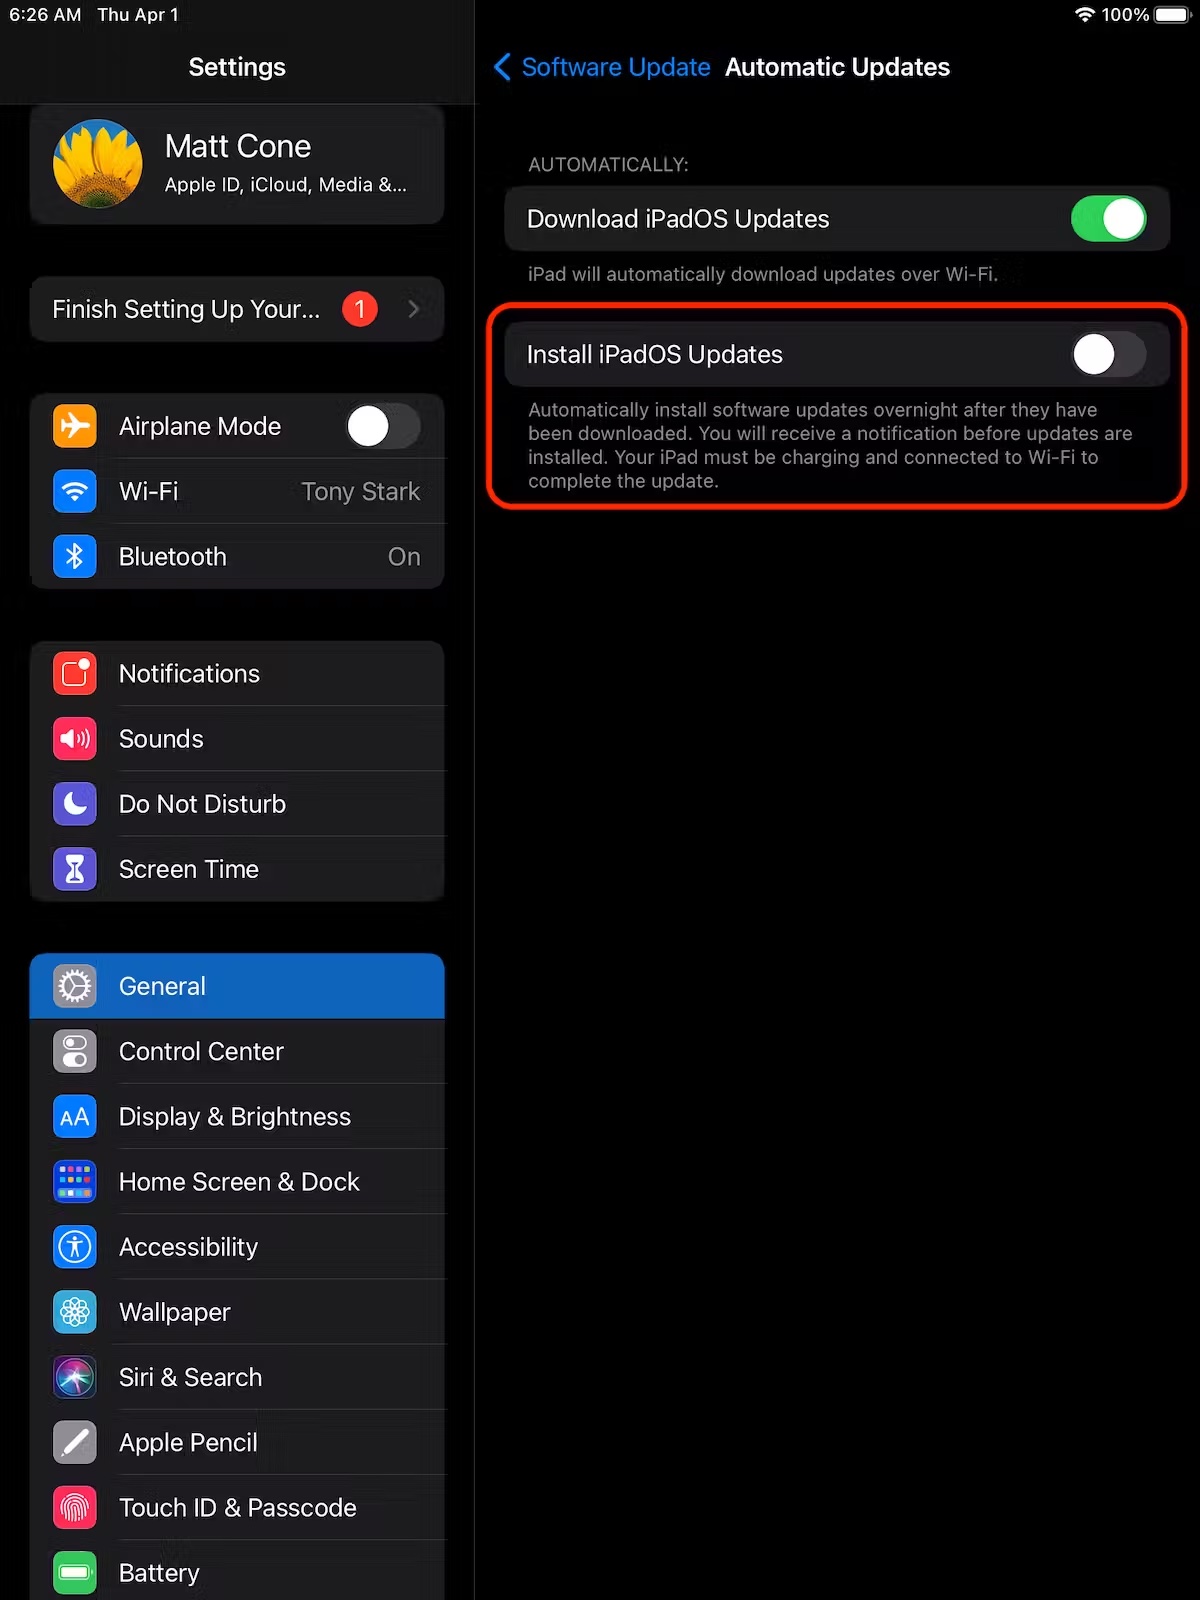
Here’s how to disable automatic updates on your iPad:
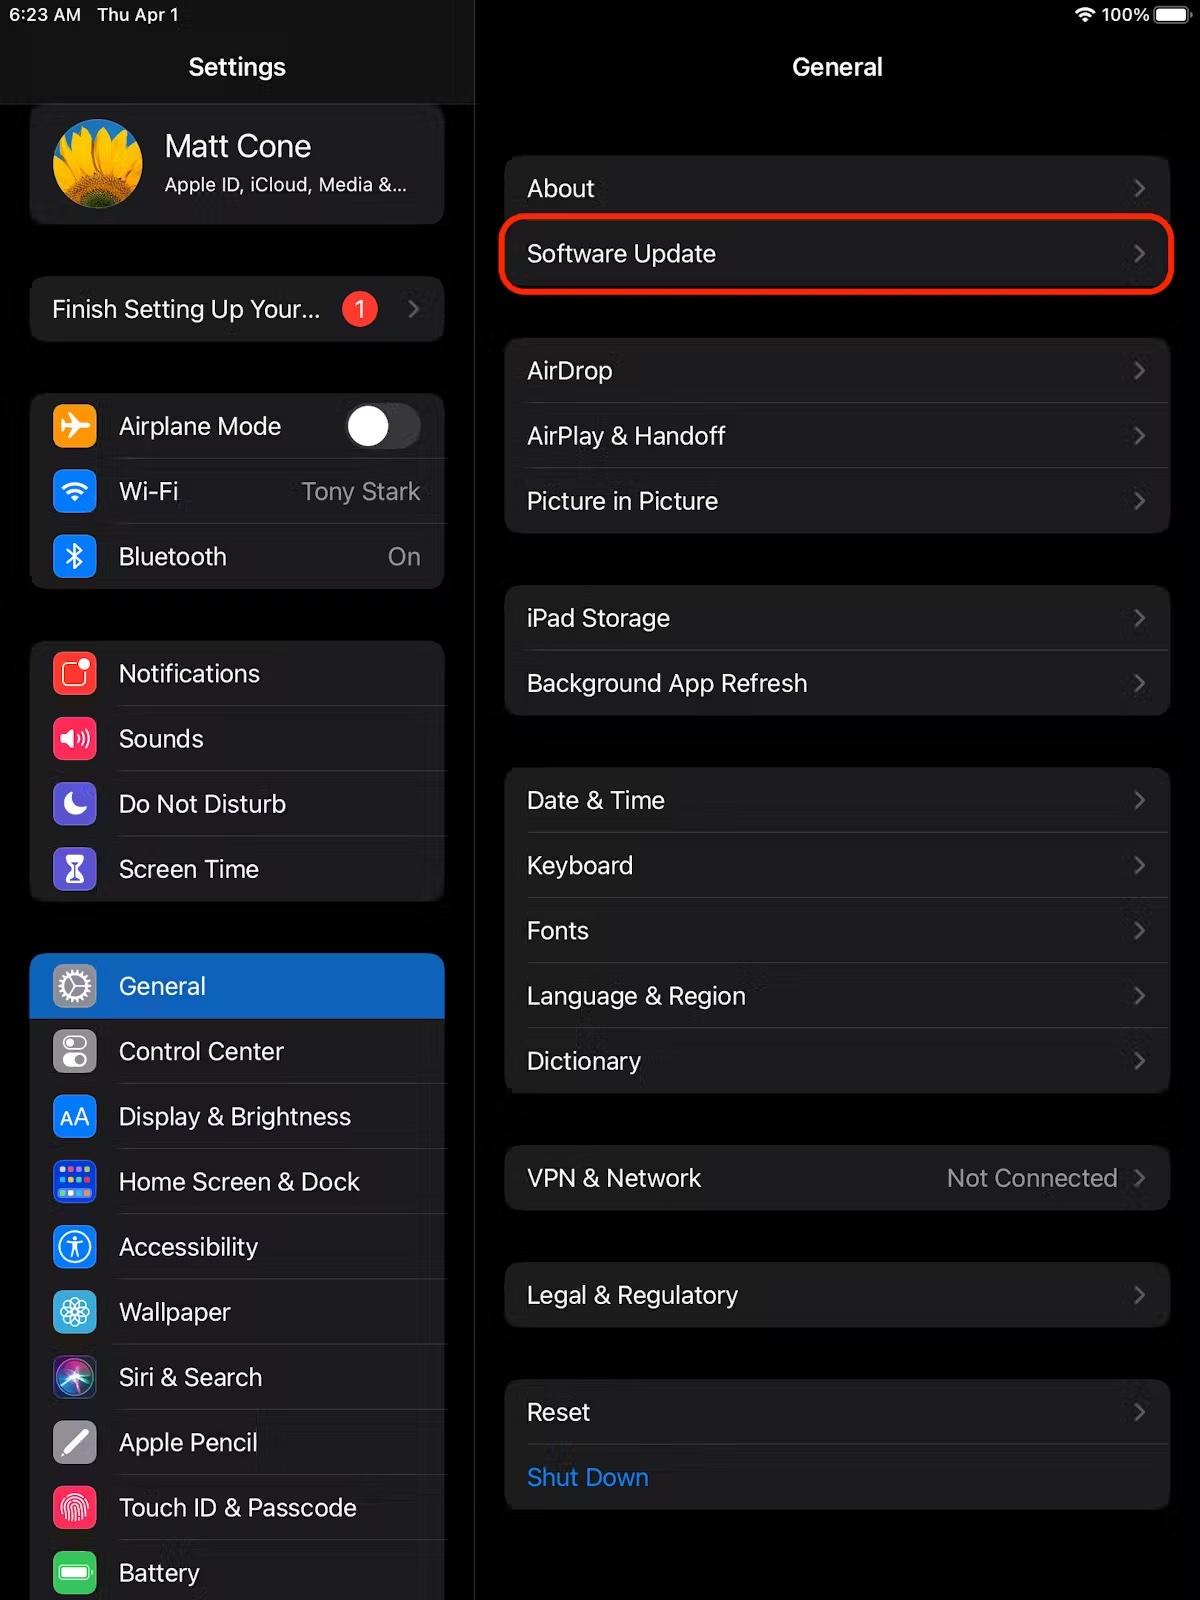
- From the iPad’s home screen, tap Settings.
- Tap General.
- Tap Software Update. [view screenshot]
- Tap Automatic Updates. [view screenshot]
- Tap the Install iOS Updates switch so it’s in the off position. This will prevent your iPad from automatically installing software updates. [view screenshot]
- That’s it! You’ve successfully disabled automatic updates on your iPad.
![view screenshot]](https://cdn.bcm.edu/sites/default/files/ipad-disable-automatic-updates-2.jpeg)
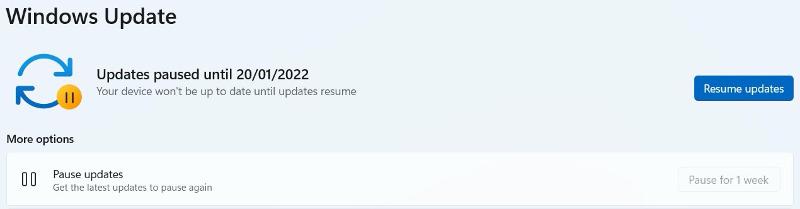
You can’t stop updates altogether, but you can pause them. There is also a way to disable updates, but it, too, is not permanent. If you want to hold off in case of any potential glitches or would rather put them off as long as possible, here is how to adjust your settings.
Stop Windows 11 automatic updates temporarily in Settings
This is by far the simplest method, but it’s also the most limited. If you’re getting bombarded with updates right now but don’t want to have to check manually long-term, it’s worth trying:
- Open Settings
- Select Windows Update from the left pane – it’s usually at the bottom of the list
- Under ‘More updates’, you’ll find an option to ‘Pause updates’. Click the button marked ‘Pause for 1 week’, after which automatic updates will continue again [view screenshot]
- Windows 11 turn off automatic updates
- However, this setting completely disables updates for seven days, or until you resume them. There’s no option to continue installing them manually.
NOTE: Unfortunately, unlike with Windows 10, where you could pause updates for up to 35 days, in Windows 11, you only get up to those three weeks.
How to turn off automatic updates: Pause updates
Permanently disabling automatic updates in Windows 10 may cause security and stability problems, so you may prefer to “pause” to install them at a more convenient time.
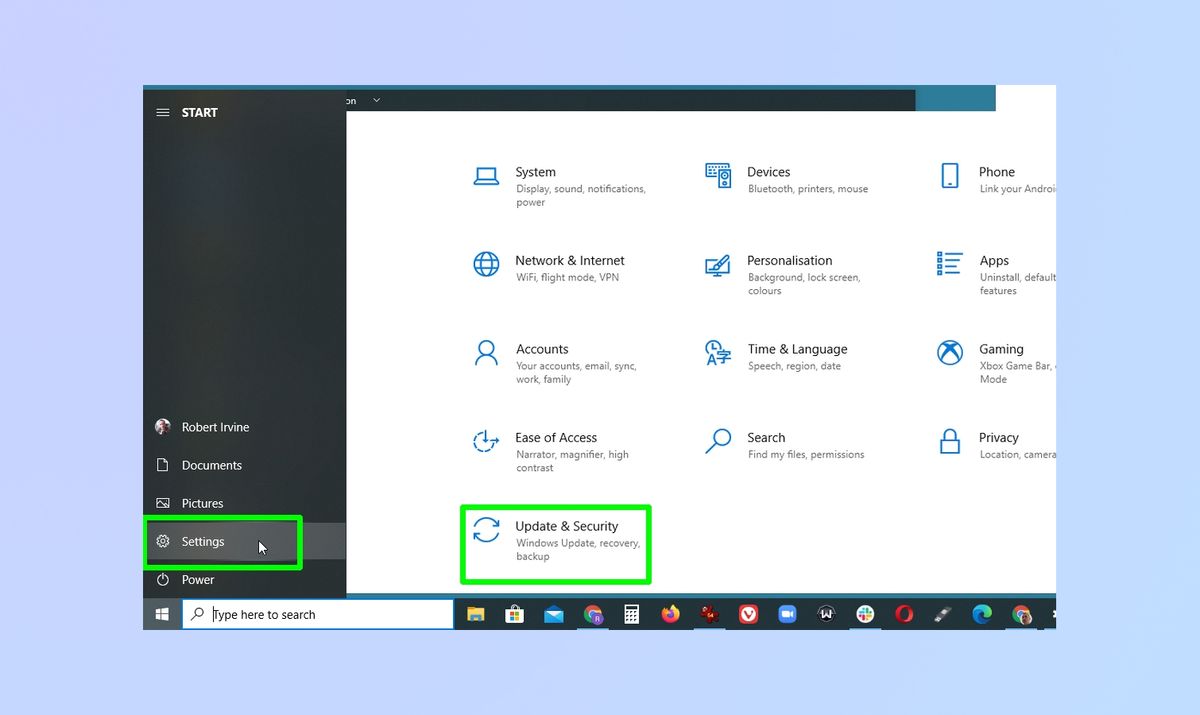
Here’s how to do it. For all these steps, make sure you're logged in as a user with administrative privileges.
- Open the Settings app in Windows 10 by clicking the Start button and selecting the gear icon. When the Settings window opens, click Update & security. [view screenshot]
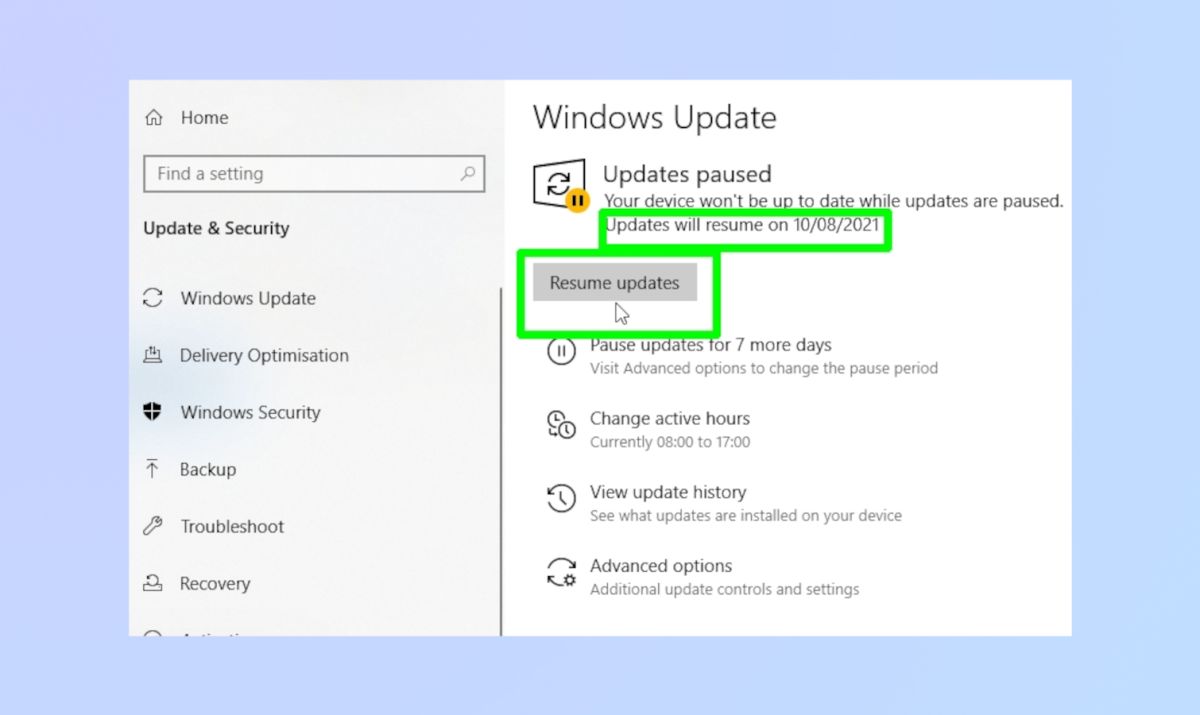
- Select Windows Update in the left-hand menu. To turn off automatic updates for one week, click the Pause updates for 7 days option. [view screenshot]
- Windows 10 will tell you the date that updates will start again. To turn them back on manually before then, click Resume updates. [view screenshot]
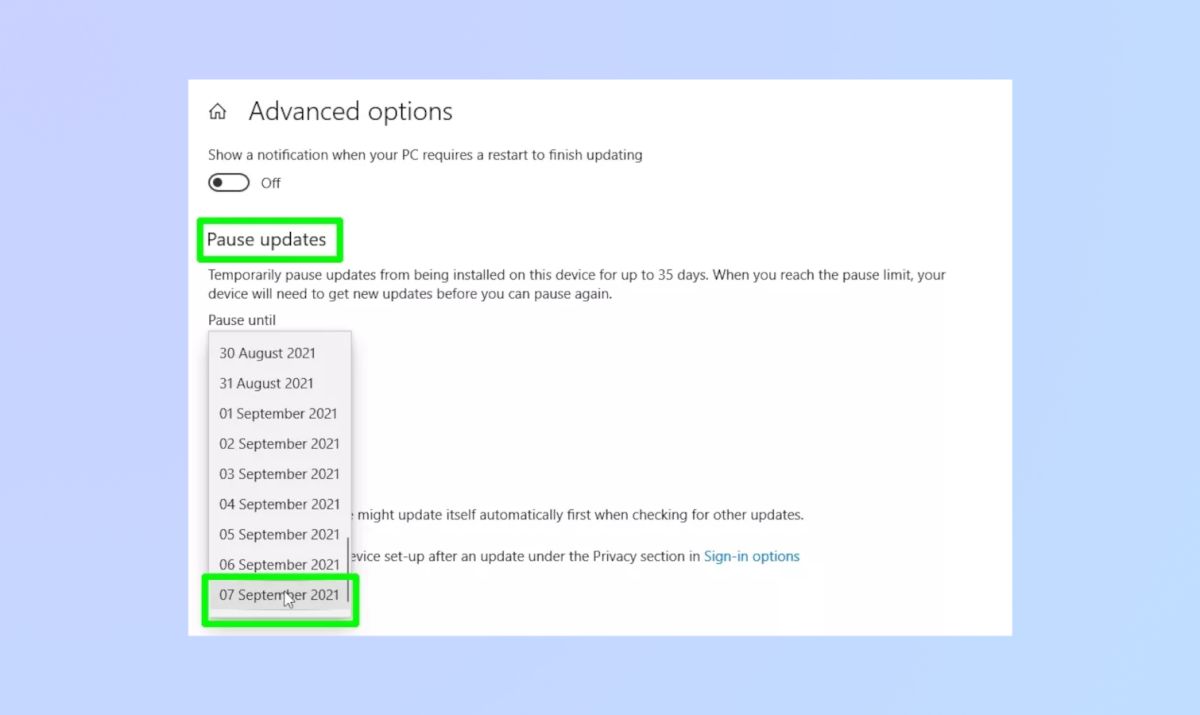
- If you think that seven days is too short a period to pause automatic updates, click Advanced options instead.
- Scroll down to Pause updates and select a date from the Pause until drop-down menu. This date can be up to 35 days into the future.
- Once you reach that date, you’ll need to install the latest Windows updates before you can pause them again. [view screenshot]